FORUM HELP
POSTS
INFORMATION FOR REGISTERED FORUM MEMBERS
How to Add Images to Forum Posts.
So you want to add a happy snap or two to your latest post? Why
not, it sure beats typing an extra thousand words!! Unfortunately, this task is
not as straightforward with this site as it is with other social media.
However, by following the advice below you should be able to achieve the
desired results and impress us with your photogenic prowess.
Linked Image Option < Preferred method.
This method requires that your images must first be loaded
on a third party host such as Dropbox, Photobucket, Flickr, Picasa, etc or
perhaps on your own or someone else’s website. The reason this is our preferred
method is because it reduces the number of steps required and removes the
burden of us having to store the image on our server (which costs us money!).
To apply this method, follow these steps:
Step 1
Upload your image to your favourite online photo storage
host. Most of these sites operate in very similar ways. Select your
uploaded file and the host should offer you a link address. If the site
offers a
'bbcode', copy that code directly, otherwise copy the "Direct URL"
code {URL is just another term for link address in this case}.
If you are reposting an image from another website (and have
permission to do so), click on the image then try to open its ‘Properties’ (by
right-clicking or whatever). Then look
for the full URL for the file, highlight it with your mouse, then copy it.
Step 2
Log on to your Retrieving Australia Forum account and
create a new Topic or click the [Edit] button on an existing post that was
created by you.
Step 3
Type your message and then select the location where you
want to insert your image. If you copied a "bbcode," just paste the
whole thing where you’d like it to appear, otherwise type the following:
[img]PASTE URL HERE[/img]. Replacing the "PASTE URL HERE" with the
actual link address for the image.
Step 4 Click the [Preview] button to check if your image/s are
appearing correctly, make any adjustments necessary and then finally click
[Post] to post your message.
Attachment Option - Inserting images directly. Sometimes it won’t be practical to use the preferred method above.
If this is the case then it’s okay to load images directly from your computer
into posts. However, please keep the number down to as few as is really needed.
To apply this method, follow these steps:
Step 1
The first thing you should consider doing is reducing the
size of the image. Most digital camera photos these days produce
high-resolution images that are too big for our program. So, it will try to
compensate by truncating the image and adding those ugly scroll bar things.
There are lots of methods for reducing images (mainly with the use of ‘image
editors’) and if you are not sure how, then Google “Reduce image file size” for
various options available.
The ideal ‘file type’ to upload is a .JPG file, and to avoid
possible complications, the maximum size to Resize your image to is 340 High in
Pixels. The image width will generally not be an issue if your editor
automatically scales down images in proportion to the height (most do this by
default).
Remember to first Re-name and then Save any modified image/s
to your computer. Once you get used to manipulating images this way you can
also experiment with ‘cropping’ which can also reduce size.
Got that sorted out? Great, now try this...
Step 2
Log on to your Retrieving Australia Forum account and
create a new Topic or click the [Edit] button on an existing post that was
created by you.
Step 3
Below the box where you type your post there is a tab that
says "Upload attachment". Click on that, then click the [Browse]
button next to filename. Find the file of the image to be uploaded and hit [Add
file]. You can then select the [Place inline] button which will insert the image
inline with the text (NB sometimes the code for the image ends up inserted
elsewhere in the text. If this happens, just cut and paste it where you want it
to be). If you don't select the 'Place inline' option, the image just gets
attached to the post at the end.
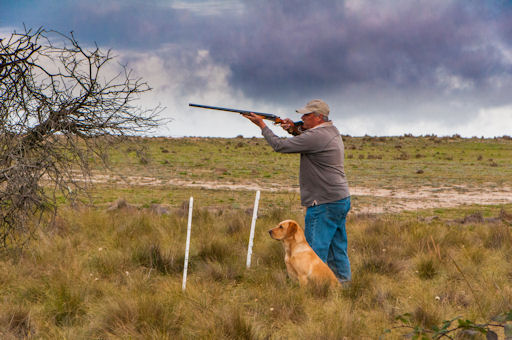
Here's an example of a standard photo reduced to the ideal
size, i.e. 340 High (pixels).
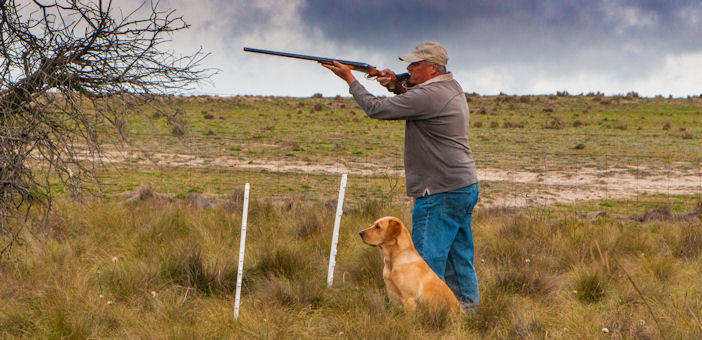
 Here's the same photo cropped, but still resized to 340
High (pixels).
Here's the same photo cropped, but still resized to 340
High (pixels).
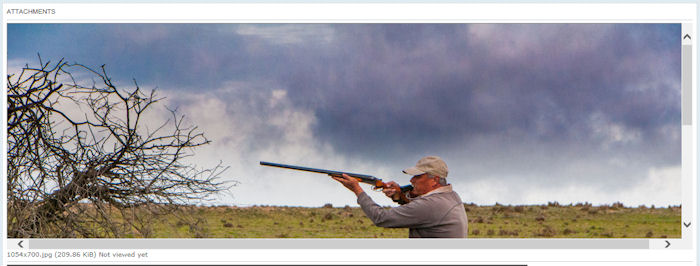
 Here's what happens if the photo is inserted without being reduced... Yuk!
 EXCEPTION TO THIS RULE -
there's always one! The above applies to ideal photo situations but in
some circumstances a reduced photo won't provide the reader with enough
detail that may be needed, such as a photo that contains text to be
read. In these situations it may be better to not reduced the photo.
Readers always have the option to expand a trucated photo any time
by simply placing their cursor (or finger for tablets) and single
clicking (taping) to increase the size on screen. However this is
not widely known amoung users. If you post a photo that is
truncated, consider adding some words like "Click photo to enlarge"
above or beneth it.
The All Else Fails Option – A last resort back-up.
Please have a go at inserting images by yourself, however if
things just won’t work out properly for you, then feel free to email any
important image/s to RA Admin at retrievingaustralia@gmail.com
with details of what you were hoping to achieve. We will try to take it from there.
Good Luck :o)
EXCEPTION TO THIS RULE -
there's always one! The above applies to ideal photo situations but in
some circumstances a reduced photo won't provide the reader with enough
detail that may be needed, such as a photo that contains text to be
read. In these situations it may be better to not reduced the photo.
Readers always have the option to expand a trucated photo any time
by simply placing their cursor (or finger for tablets) and single
clicking (taping) to increase the size on screen. However this is
not widely known amoung users. If you post a photo that is
truncated, consider adding some words like "Click photo to enlarge"
above or beneth it.
The All Else Fails Option – A last resort back-up.
Please have a go at inserting images by yourself, however if
things just won’t work out properly for you, then feel free to email any
important image/s to RA Admin at retrievingaustralia@gmail.com
with details of what you were hoping to achieve. We will try to take it from there.
Good Luck :o)
©
This
page is provided by Working Gundog Club Inc.
(Affiliated with Dogs NSW)